
27
FebDispatches in Sandpaper: Send 20-Grit
 When you buy a fixer-upper house, sooner or later you need to start fixing it up before it can feel like home. And if you’re fixing the place up on a shoestring budget, you find creative solutions and invest sweat equity wherever possible. You start by checking the low-hanging fruit off the punch list, tasks like spackling mysterious holes in the original window frames, replacing lightbulbs, and gingerly tucking the porch door screen back into its frame with a butter knife.
Next you move onto jobs that are a bit more disruptive and take more time and resources, but that go a long way towards improving the look of the house. Painting is a great thing to do at this phase. Taping window frames and baseboards is a time consuming precursor to painting, but is very much worth it if the color of your paint is significantly different than the wood trim, if you’re trying to preserve the natural-wood look of that trim, or if you’re painting an accent wall.
The painting step goes something like this: after taping, grab some paint testers and throw some swatches up on the wall. Abandon the entire color palette and get more testers. Commit to a color scheme and begin transforming the look of your walls. Have so much fun painting that you decide to paint every room in your house. Every. Room. Because it turns out that having one freshly painted room makes the rooms that previously looked just fine suddenly look as dingy and dated as a 1980s B-reel movie. Oh, and remember that wood trim you spent hours taping? Well, that needs to be repainted now too, because the charming antique cream suddenly looks like dishwater splashed at the edges of your crisp and tasteful grey walls.
Be prepared for a few necessities to take priority along the way, like needing to re-plumb a section of the nearly brand new furnace because the previous owners cracked it and now it’s leaking. Also rip out the carpet almost immediately, because on the one hand you have no idea how long it’s been there, and on the other your cat has made it abundantly clear that she smells dog and she is having NONE of it.
If you’re lucky enough to be surprised by hardwood floors under that nasty old carpet and if you’ve come this far on your fixer-upper journey, then it is well within your reach to refinish those floors yourself and bring them back to life. And if you’ve been putting off refinishing the floors for several months, give yourself a deadline by ordering furniture for those rooms that’s too big to fit through any doorway except the front door.
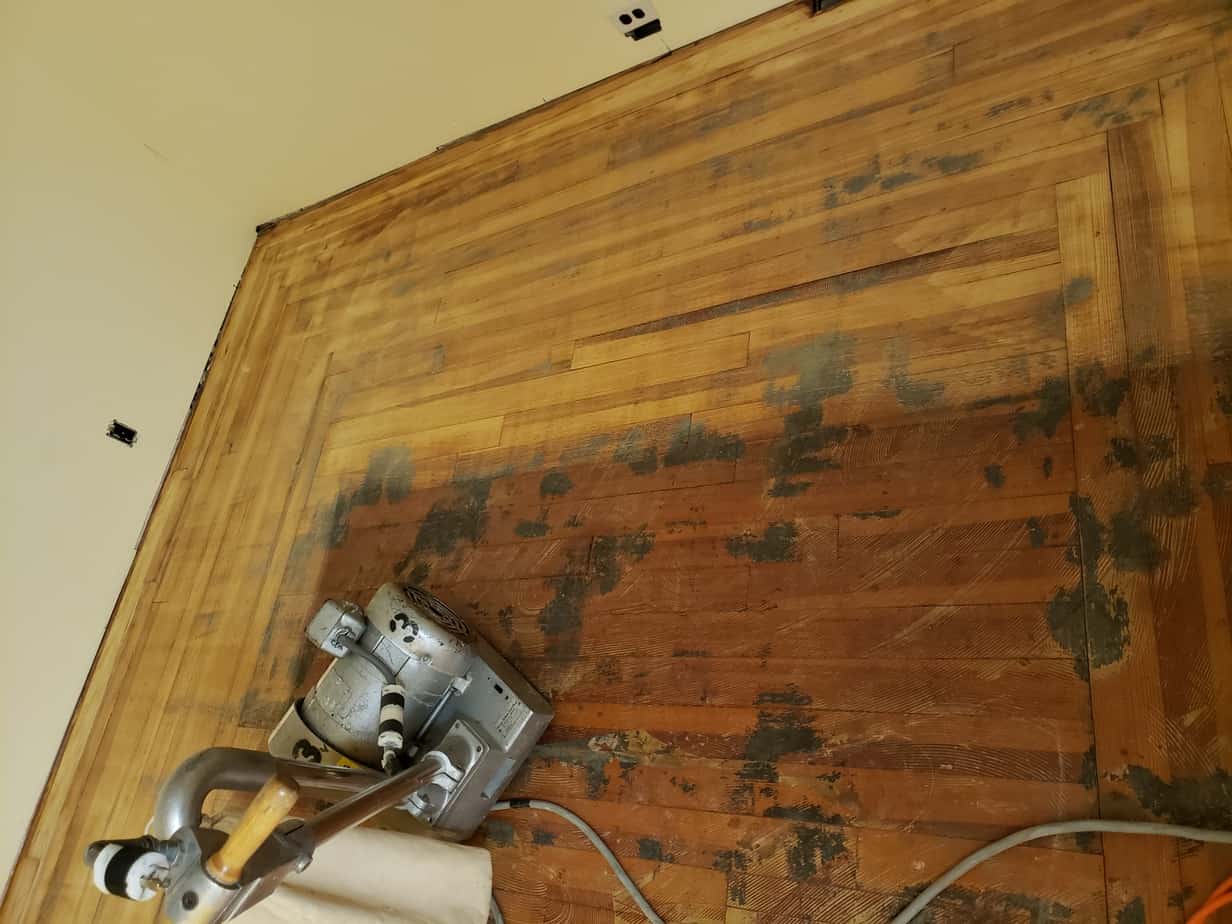
In all seriousness though, when faced with the logistics of refinishing your own floors, the project can seem huge and daunting. With a plan in place, advice from experts, and more than a little moxie, the whole job can be done in a weekend. To prepare for refinishing your floors, you’ll want to patch any broken or damaged boards and pull out any lingering carpet staples. With a hammer and nail punch, go all over your floor and pound down any nails that are at or above the surface of the existing wood; refinishing floors yourself can save a lot of money, but damaging the rental equipment on protruding nails would be very expensive.
Being a DIY-extraordinaire, you may be tempted at this point to use a hand sander to sand along the walls. I implore you resist this urge and spend the extra $25 for the room edger rental, since it will save you hours of labor and is really fun to use. Also invest in ear protection, a set of cushy comfy knee pads, and extra-strength Tylenol. If at all possible, try to find a local family-owned rental shop to rent the floor sanders and refinishing accoutrement. Big box hardware stores will also rent the necessary equipment, but by working with professionals who have specialized in this sort of work for years you’ll get expert advice and tips that make the job that much easier.
Top tip: if you’re refinishing a floor that still has an old stain and or finish, and that also has mastic or glue from old floor tiles, skip all other grits of sandpaper and go straight to the heavy-duty 20-grit paper. The person renting you the equipment may advise that you can get away with 36-grit alone, and it’s true that 20-grit paper is so intense that you really cannot let the machine stop moving or else you’ll wear a groove in the wood, but good gracious does it ever work like magic.
My final advice is that even though the sawdust catchment bags on these industrial sanders are actually quite good at gathering nearly all the sawdust, you will need to dust mop your walls after the project is done. Also your windows, baseboards, and ceiling beams. You may want to hang sheets over fixtures that can’t be moved, and over open doorways. Other than that, have fun and make sure you still have a way to get to the bathroom when the polyurethane is drying on your beautiful new floors!
Luckily the library has much more detailed and professional advice than mine when it comes to home improvement and DIY projects. Though dated, Grand Finishes for Walls and Floors by Matt Nikitas has indispensable sage advice like the sort you’d get if your dad were a finish contractor helping at every step of the process. Installing & Finishing Flooring by William Spence is worth a look, as is The Complete Guide to Flooring by Black & Decker. For more general home maintenance and DIY how-to’s, try How to Fix Anything by Popular Mechanics, The Complete Photo Guide to Home Improvement by Black & Decker, and The Ultimate Guide to Home Repair and Improvement by Creative Homeowner. If you’re not quite ready to roll up your sleeves and are looking for inspiration, we have tons of books about decorating, organizing, and refreshing your space and furnishings, such as Weekend Furniture Facelifts by Helen Carey and Styling with Salvage by Joanne Palmisano. I also highly recommend a few DIY magazines available through Flipster, such as Do It Yourself, The Family Handyman, Better Homes and Gardens, and Flea Market Decor. There are even more magazines available through the Libby app by Overdrive, such as HGTV Magazine, Country Living, Elle Decor, Good Housekeeping, and House Beautiful.
Good luck, fixer-uppers! As Red says in the classic Canadian comedy, The Red Green Show, “I’m pulling for you. We’re all in this together.”
Liz Reed is the Adult Services Librarian at the Morrill Memorial Library in Norwood MA. Look for her article in the February 27, 2020 issue of the Transcript and Bulletin.